参照画像活用
このモジュールで学ぶこと
- 参照画像の4つの役割(Subject/Style/Background/Control)
- キャラクターと背景の合成
- スタイル転写(アート風、アニメ風への変換)
- 複数の参照画像を組み合わせた高度な生成
学習目標
このモジュールを終えると、以下のことができるようになります:
- 参照画像の役割を明示的に指定できる
- キャラクターを別の背景に自然に配置できる
- 写真を絵画やアニメスタイルに変換できる
- 複数の参照画像を効果的に組み合わせられる
目次
- 事前準備
- セクション1: 参照画像の役割分担
- セクション2: キャラクター配置
- セクション3: スタイル転写
- セクション4: 複数参照画像の組み合わせ
- セクション5: 実践プロジェクト
- トラブルシューティング
- まとめ
- よくある質問
事前準備
必要なもの
- キャラクター一貫性で使用した環境とスクリプト
- 参照用の画像(キャラクター、背景、スタイル参照用)
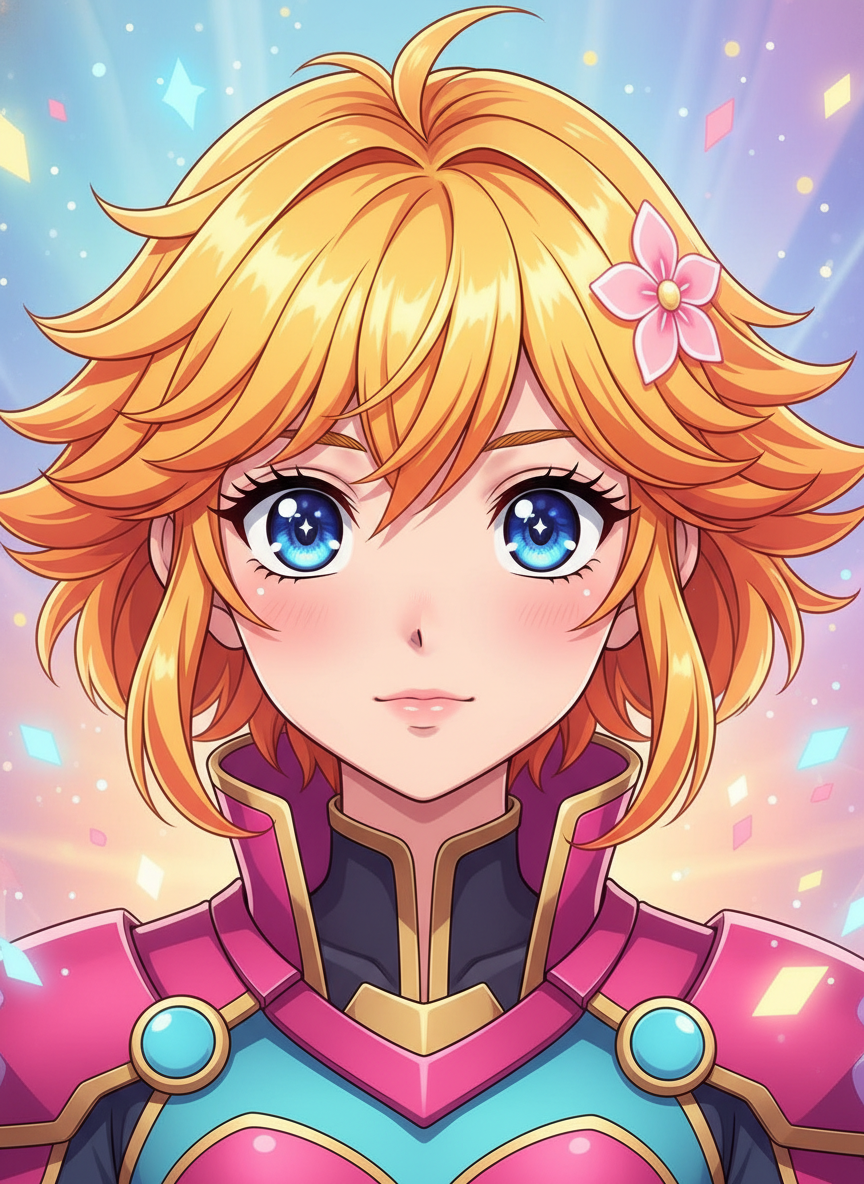
Step 1: キャラクター参照画像の確認
Module 05で生成したキャラクターシートを使用します。以下のファイルがあることを確認してください:
| ファイル名 | 説明 | 生成場所 |
|---|---|---|
character_sheet_yuki.png | Yukiのキャラクターシート | Module 05 セクション2-2 |
ヒント: ジェネレータボタンでは参照画像のファイル名を自由に変更できます。自分で生成したキャラクターシートを使う場合は、そのファイル名に置き換えてください。
Step 2: 背景画像の生成
このモジュールで使用する背景画像を事前に生成します。
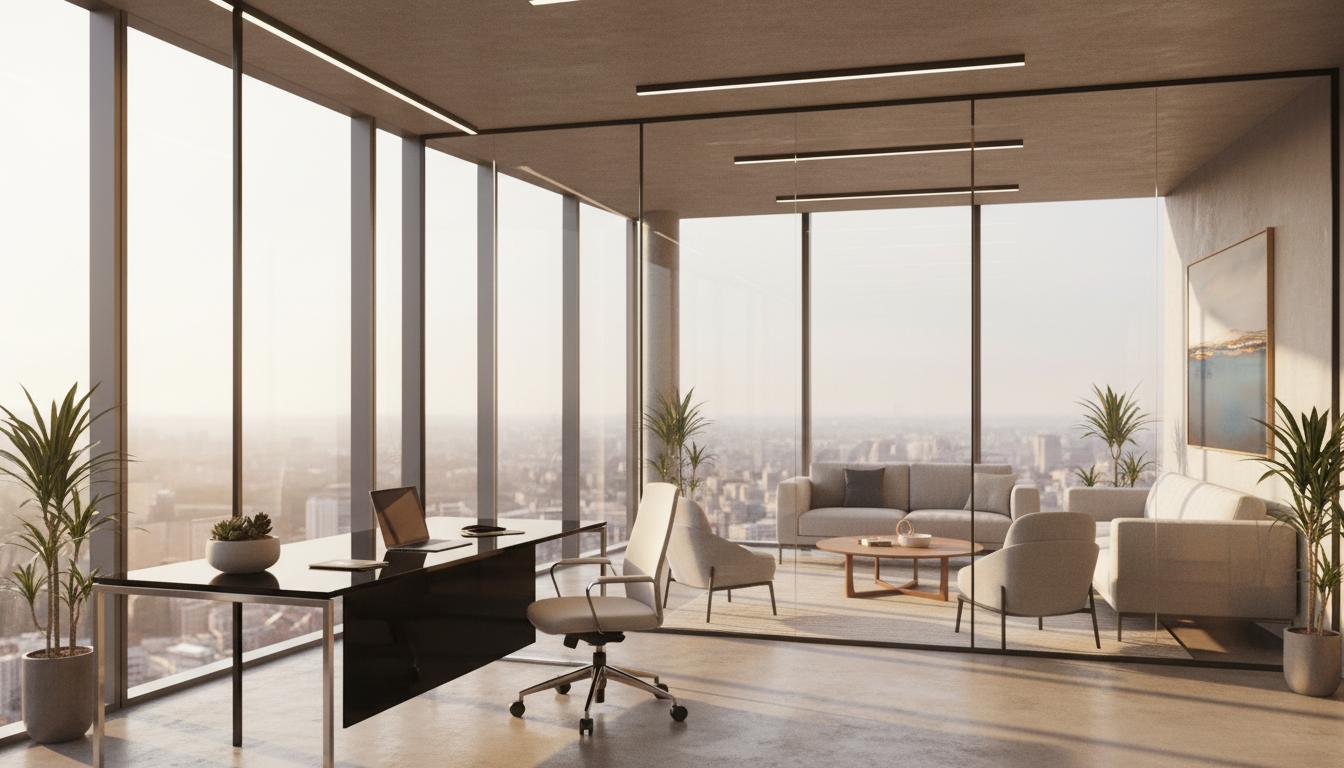
オフィス背景
ビジネスシーン合成で使用するオフィス背景を生成します。
クリックしてPythonコマンドを生成
生成例:
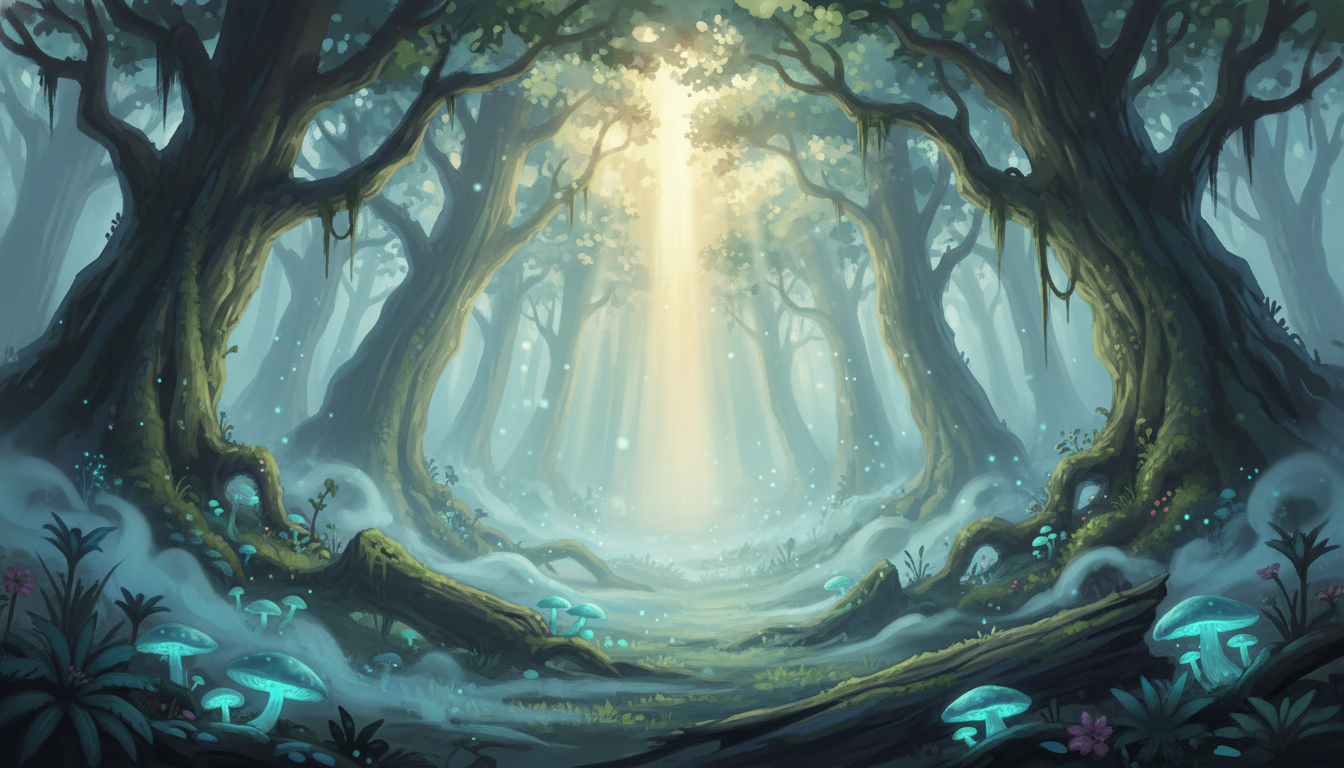
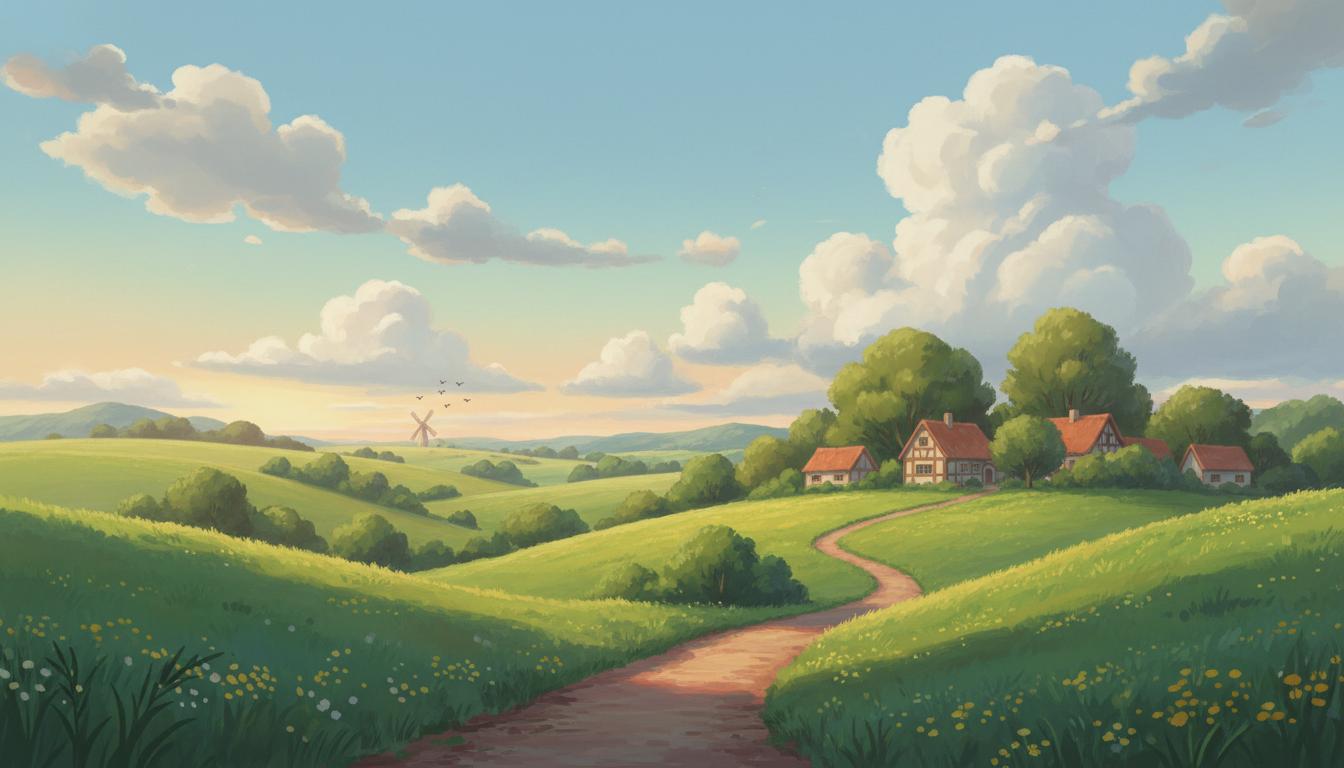
ファンタジーの森
ファンタジーシーン合成で使用する森背景を生成します。
クリックしてPythonコマンドを生成
生成例:
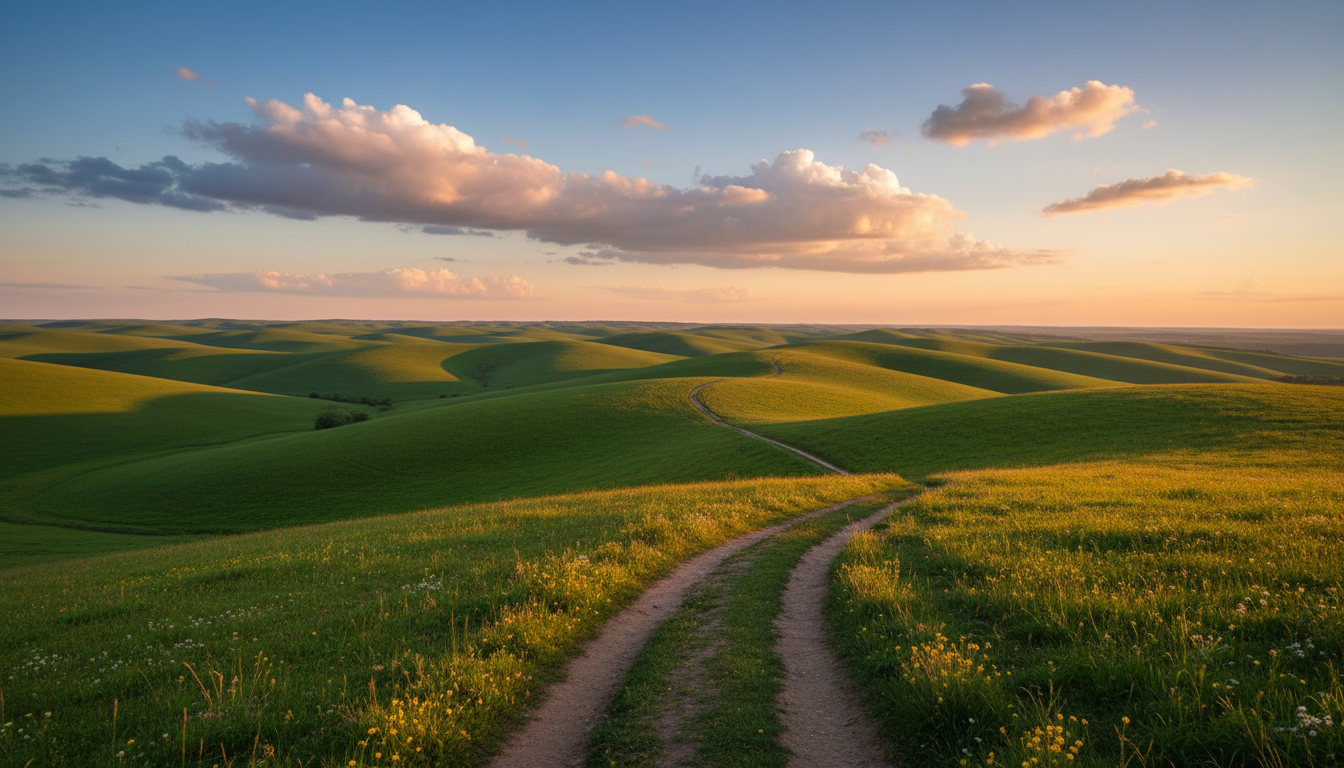
汎用背景
位置・スケール指定の練習で使用する背景を生成します。
クリックしてPythonコマンドを生成
生成例:
Step 3: スタイル参照画像の生成
スタイル転写で使用する参照画像を事前に生成します。
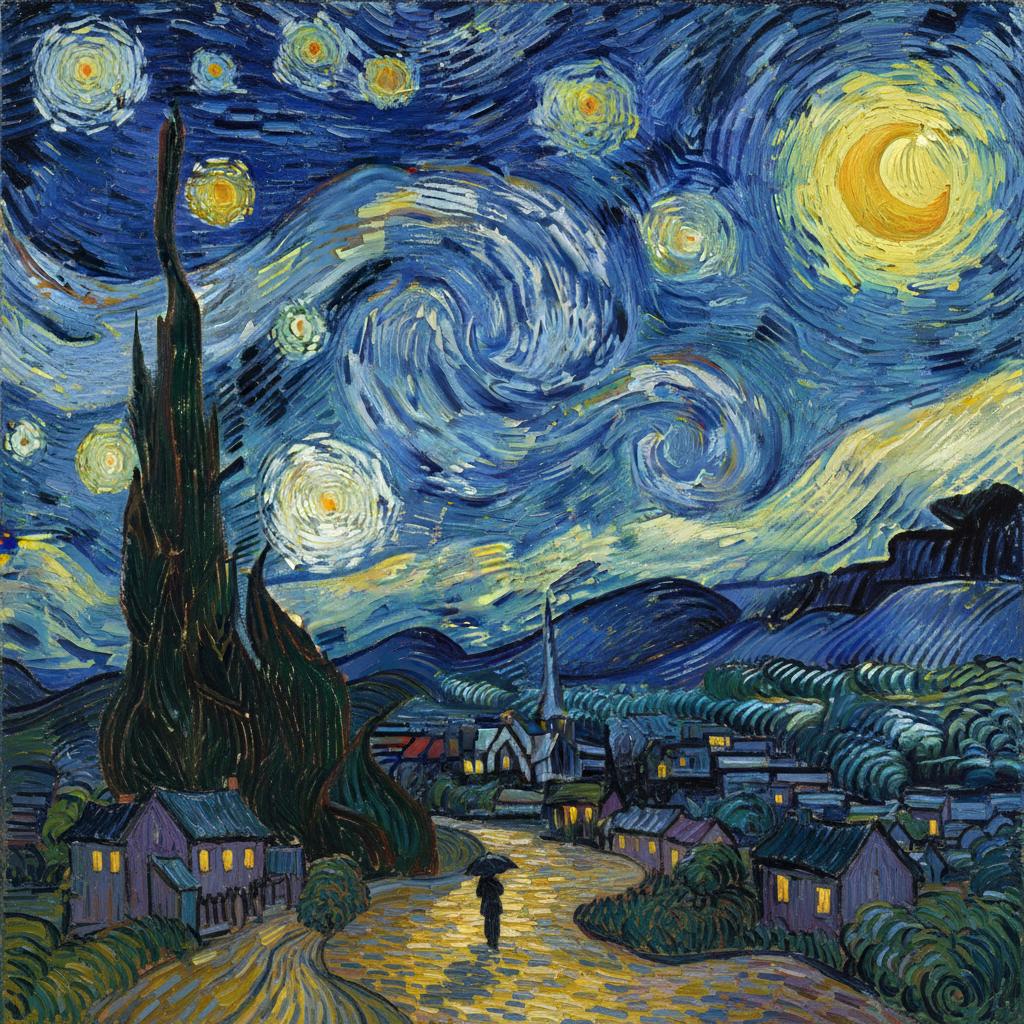
ゴッホ風スタイル参照
油絵風変換で使用するスタイル参照を生成します。
クリックしてPythonコマンドを生成
生成例:
アニメスタイル参照
アニメ風変換で使用するスタイル参照を生成します。
クリックしてPythonコマンドを生成
生成例:
ジブリ風スタイル参照
ジブリ風シーンで使用するスタイル参照を生成します。
クリックしてPythonコマンドを生成
生成例:
Step 4: コントロール画像の生成
ポーズ転写で使用する参照画像を生成します。
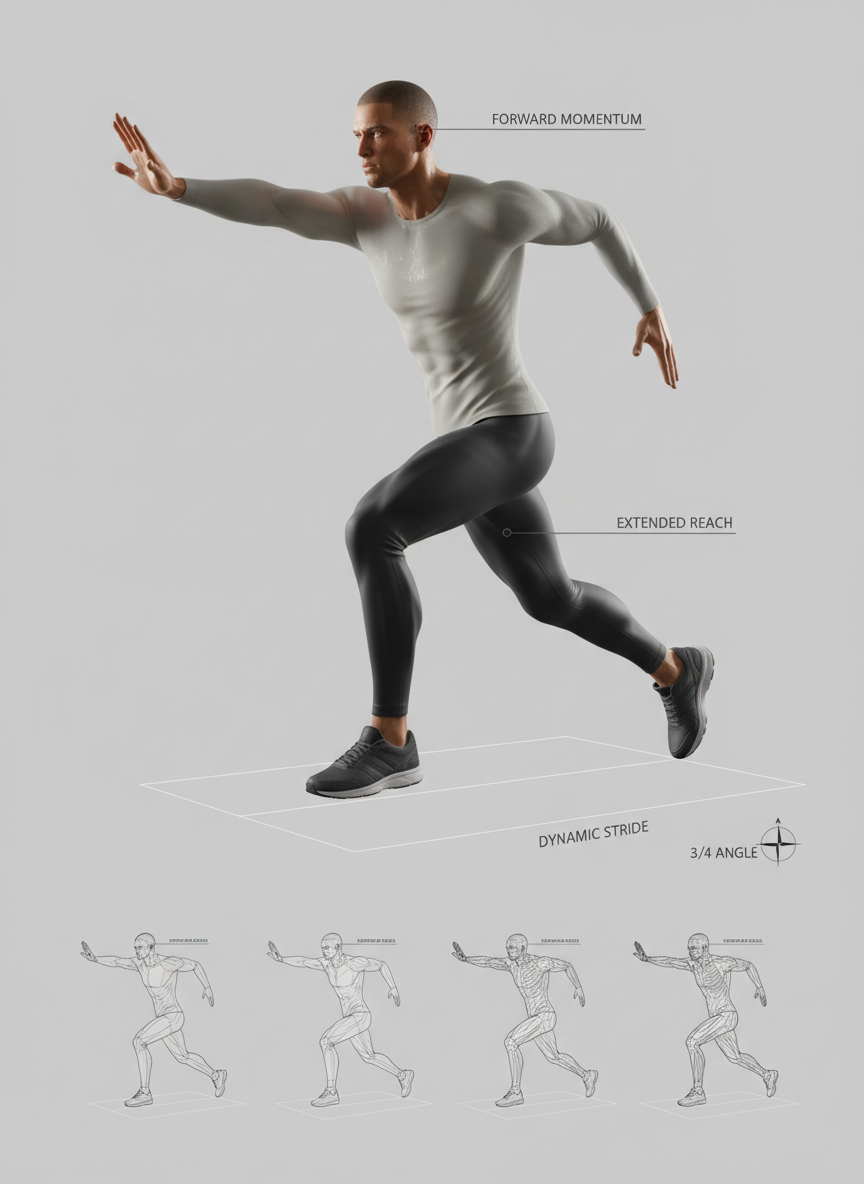
アクションポーズ参照
クリックしてPythonコマンドを生成
生成例:
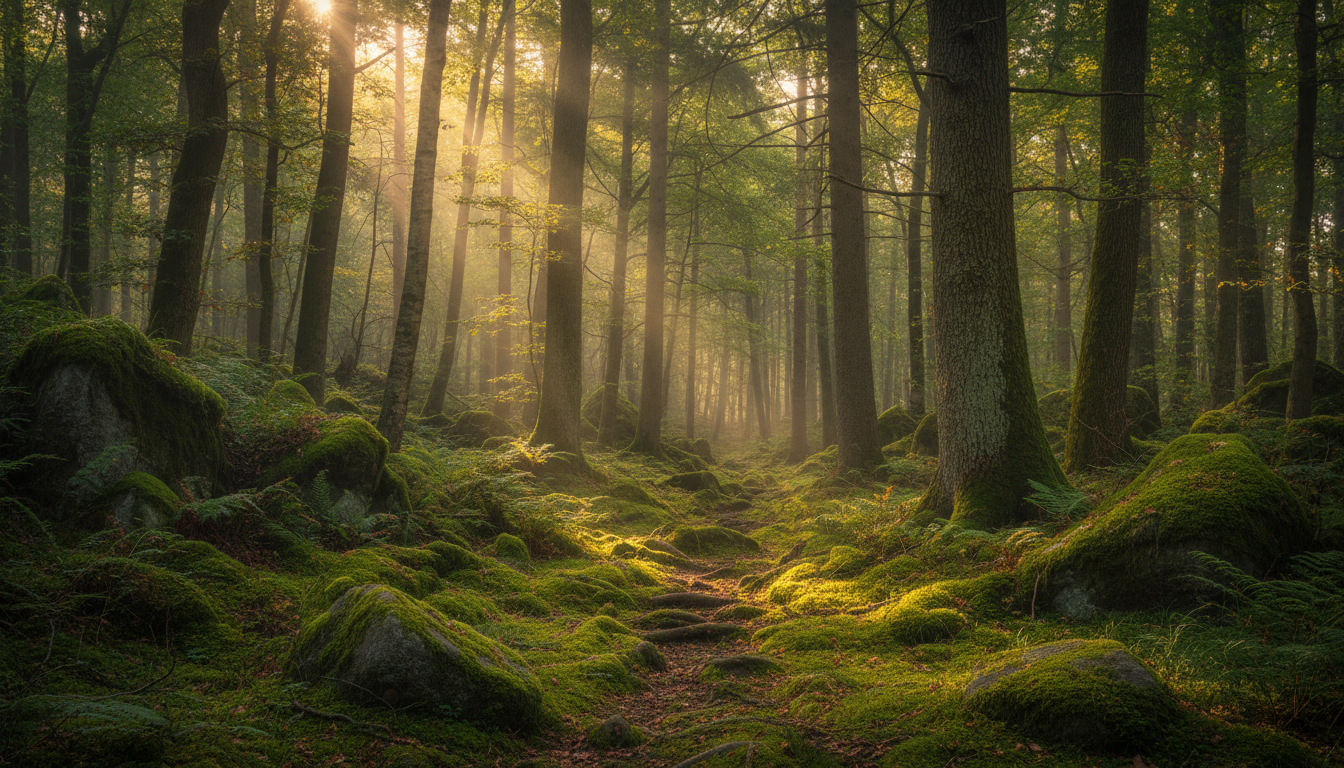
Step 5: 森の写真(3画像合成用)
3画像合成で使用する森の写真を生成します。
クリックしてPythonコマンドを生成
生成例:
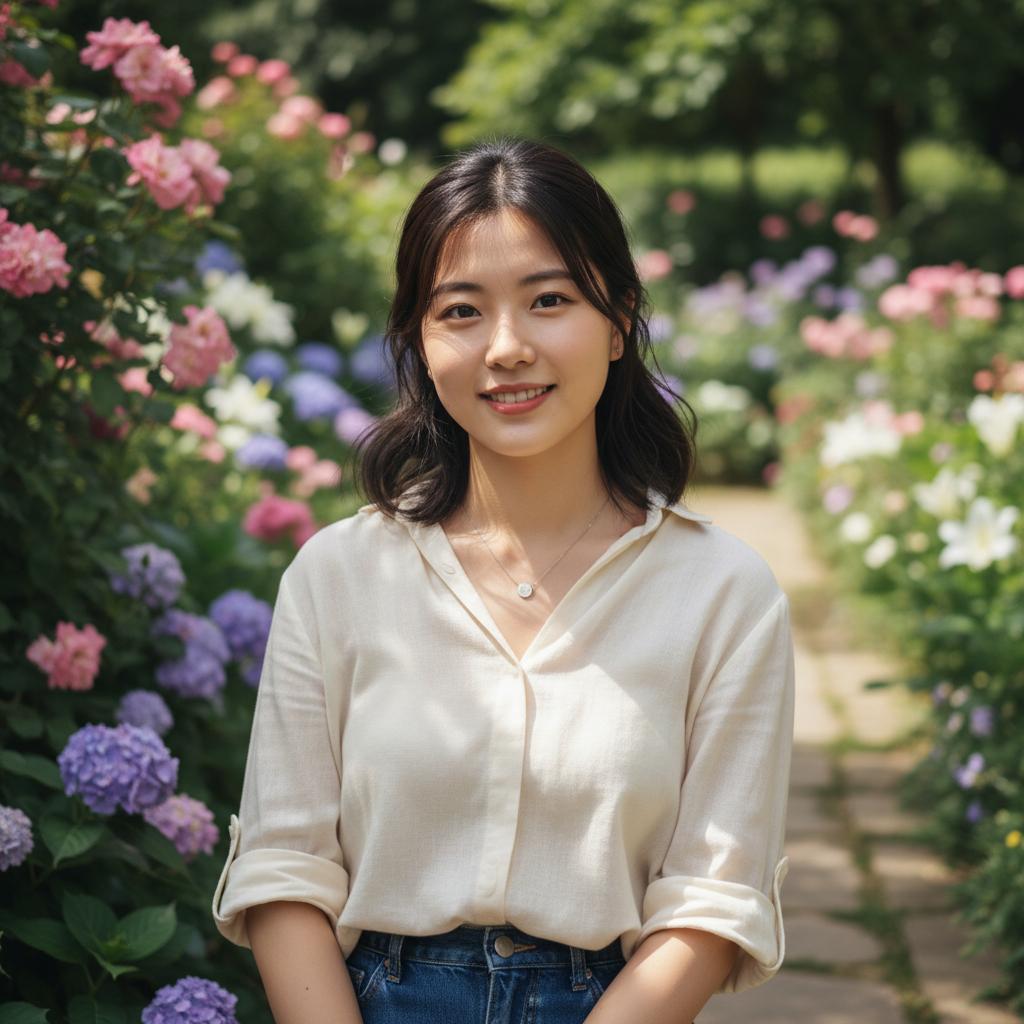
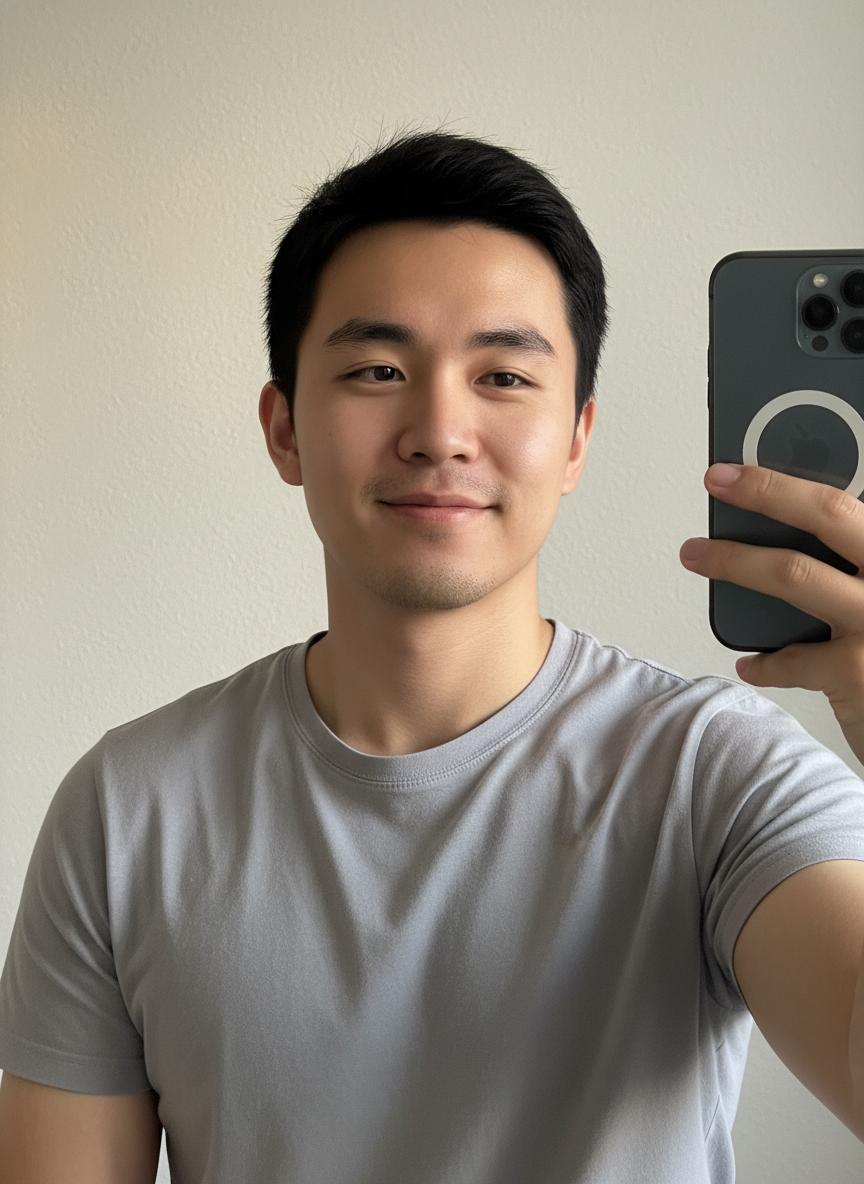
Step 6: サンプル人物写真の生成(任意)
スタイル転写で使用する人物写真がない場合は、以下のサンプルを生成してください。
注意: ご自身の写真がある場合は、そちらを
photo.jpgやselfie.jpgとして使用することをお勧めします。
スタイル転写用サンプル写真
油絵風変換などで使用するサンプル写真を生成します。
クリックしてPythonコマンドを生成
生成例:
アニメ変換用サンプルセルフィー
アニメ風変換で使用するサンプルセルフィーを生成します。
クリックしてPythonコマンドを生成
生成例:
生成した画像の確認
上記のステップで以下の画像が生成されていることを確認してください:
| ファイル名 | 用途 | 必須 |
|---|---|---|
office_background.png | セクション2-2 ビジネスシーン | ✓ |
fantasy_forest.png | セクション2-3 ファンタジーシーン | ✓ |
background.png | セクション2-4 位置・スケール指定 | ✓ |
vangogh_style.jpg | セクション3-2 油絵風変換 | ✓ |
anime_style_reference.png | セクション3-3 アニメ風変換 | ✓ |
ghibli_style_reference.jpg | セクション4-2 ジブリ風シーン | ✓ |
action_pose.png | セクション4-3 ポーズ転写 | ✓ |
forest_photo.png | セクション4-2 ジブリ風シーン | ✓ |
photo.jpg | セクション3-2 油絵風変換 | 任意(自分の写真またはサンプル) |
selfie.jpg | セクション3-3 アニメ風変換 | 任意(自分の写真またはサンプル) |
参照画像生成スクリプト(再掲)
from google import genai
from google.genai import types
from PIL import Image
import io
import os
from dotenv import load_dotenv

load_dotenv()
client = genai.Client(api_key=os.getenv("GOOGLE_API_KEY"))

def generate_with_reference(prompt, reference_images, filename="output.png", aspect_ratio="1:1"):
    """参照画像を使用して画像を生成

    Args:
        prompt: プロンプト文字列
        reference_images: PIL Imageオブジェクトまたはファイルパスのリスト
        filename: 出力ファイル名
        aspect_ratio: アスペクト比
    """
    # 参照画像を読み込み
    images = []
    for ref in reference_images:
        if isinstance(ref, str):
            images.append(Image.open(ref))
        else:
            images.append(ref)

    # contentsを構築(プロンプト + 画像)
    contents = [prompt] + images

    response = client.models.generate_content(
        model="gemini-2.5-flash-image",
        contents=contents,
        config=types.GenerateContentConfig(
            response_modalities=['IMAGE'],
            image_config=types.ImageConfig(aspect_ratio=aspect_ratio)
        )
    )

    for part in response.candidates[0].content.parts:
        if hasattr(part, 'inline_data'):
            image = Image.open(io.BytesIO(part.inline_data.data))
            image.save(filename)
            print(f"画像を保存しました: {filename}")
            return image
    return None
セクション1: 参照画像の役割分担
1-1. 4つの役割
参照画像には以下の4つの役割があります。
| 役割 | 説明 | 使用例 |
|---|---|---|
| Subject Reference | 人物/キャラクター/オブジェクトのアイデンティティを保持 | キャラクターを別シーンに配置 |
| Style Reference | ルック&フィール(パレット、筆遣い、照明)を転写 | 写真を油絵風に変換 |
| Background Reference | 背景環境を指定 | 特定の背景に人物を配置 |
| Control Image | 構図やポーズを制御 | 特定のポーズを維持 |
1-2. 参照画像の上限
| モデル | 総参照画像数 | 人物用 | オブジェクト用 |
|---|---|---|---|
| Nano Banana (2.5 Flash) | 最大3枚 | - | - |
| Nano Banana Pro (3 Pro) | 最大14枚 | 5枚まで | 6枚まで |
1-3. 役割の指定方法
プロンプトで役割を明示的に記述します。
方法1: 自然言語で役割を明示
Use Image A for the character's identity,
Image B for the art style,
and Image C for the background environment.
| 行 | 意味 | 用途 |
|---|---|---|
Image A for the character's identity | 画像Aからキャラクターの外見を維持 | Subject参照 |
Image B for the art style | 画像Bのアートスタイルを適用 | Style参照 |
Image C for the background environment | 画像Cの背景環境を使用 | Background参照 |
方法2: 番号で参照
Keep the character from Image 1 but put them in the pose from Image 2.
Apply the color palette from Image 3.
| 行 | 意味 | 用途 |
|---|---|---|
Keep the character from Image 1 | 画像1のキャラクターを維持 | Subject参照 |
put them in the pose from Image 2 | 画像2のポーズに変更 | Control参照 |
Apply the color palette from Image 3 | 画像3の色パレットを適用 | Style参照 |
方法3: 役割ラベルを使用(推奨)
Use the uploaded images as follows:
- Image 1: Subject reference (maintain character identity)
- Image 2: Style reference (apply artistic style)
- Image 3: Background reference (use this environment)
| 行 | 意味 | 効果 |
|---|---|---|
Subject reference | 人物/キャラクターの外見を保持 | 顔、髪型、服装を維持 |
Style reference | アートスタイルを転写 | 色調、筆遣い、質感を適用 |
Background reference | 背景環境を使用 | 場所、雰囲気を適用 |
ヒント: 方法3(役割ラベル)が最も明確で、AIが意図を正確に理解しやすいです。
チェックポイント
- 4つの役割を理解した
- 役割の指定方法を理解した
セクション2: キャラクター配置
2-1. 基本テンプレート
キャラクター画像と背景画像を組み合わせて、自然な合成画像を生成します。
テンプレート:
Create a new image with the following specifications:
- Use the character from Image 1 (maintain exact facial features, clothing, and proportions)
- Place them in the environment shown in Image 2
- The character should be [POSITION]
- Maintain the exact lighting and atmosphere from Image 2
- Character scale should match the environment naturally
テンプレート変数の説明:
| 行 | 意味 | 効果 |
|---|---|---|
Use the character from Image 1 | 1番目の参照画像からキャラクターを使用 | 顔、服装、体型を維持 |
maintain exact facial features, clothing, and proportions | 詳細を正確に維持する指示 | 変形を防止 |
Place them in the environment shown in Image 2 | 2番目の参照画像の環境に配置 | 背景を使用 |
[POSITION] | キャラクターの配置と姿勢 | 構図を制御 |
Maintain the exact lighting and atmosphere | 照明と雰囲気を統一 | 自然な合成 |
Character scale should match | スケールを背景に合わせる | 違和感を防止 |
POSITIONの選択肢:
| 値 | 意味 | 用途 |
|---|---|---|
standing in the center | 中央に立っている | 標準的なポートレート |
walking from left | 左から歩いてくる | 動きのあるシーン |
sitting on a chair | 椅子に座っている | インタビュー風 |
leaning against the wall | 壁にもたれている | カジュアルな雰囲気 |
2-2. 実践:ビジネスシーン
キャラクターをオフィス背景に自然に配置します。
Step 1: 参照画像を準備
- Image 1: キャラクターシート(character_sheet_yuki.png)- Module 05で生成
- Image 2: オフィス背景(office_background.png)- 事前準備 Step 2で生成
Step 2: プロンプトを作成
プロンプトの意図:
| 要素 | 記述 | 意図 |
|---|---|---|
| 位置指定 | Standing confidently near the window | 窓の近くに自信を持って立つ姿勢 |
| アイデンティティ保持 | Maintain exact facial features, hairstyle, and skin tone | 顔、髪型、肌の色を正確に維持 |
| 服装調整 | Adjust clothing to match professional context | ビジネスシーンに合う服装に調整 |
| 照明統一 | Match the warm afternoon lighting | 午後の暖かい光に合わせる |
| 影の配置 | Natural shadow placement consistent with light source | 光源に一致した自然な影 |
| スケール調整 | Scale the character appropriately for the room | 部屋のサイズに合わせて調整 |
Place the person from Image 1 into the office environment shown in Image 2.

Specifications:
- Position: Standing confidently near the window
- Maintain exact facial features, hairstyle, and skin tone from Image 1
- Adjust clothing to match professional context if needed
- Match the warm afternoon lighting from Image 2
- Natural shadow placement consistent with light source
- Scale the character appropriately for the room

The result should look like a natural photograph taken in this office.
クリックしてPythonコマンドを生成
生成例:
確認ポイント:
- キャラクターの顔が参照画像と一致しているか
- 照明が背景(午後の窓からの光)と統一されているか
- キャラクターのスケールが部屋に対して自然か
- 影が光源の方向と一致しているか
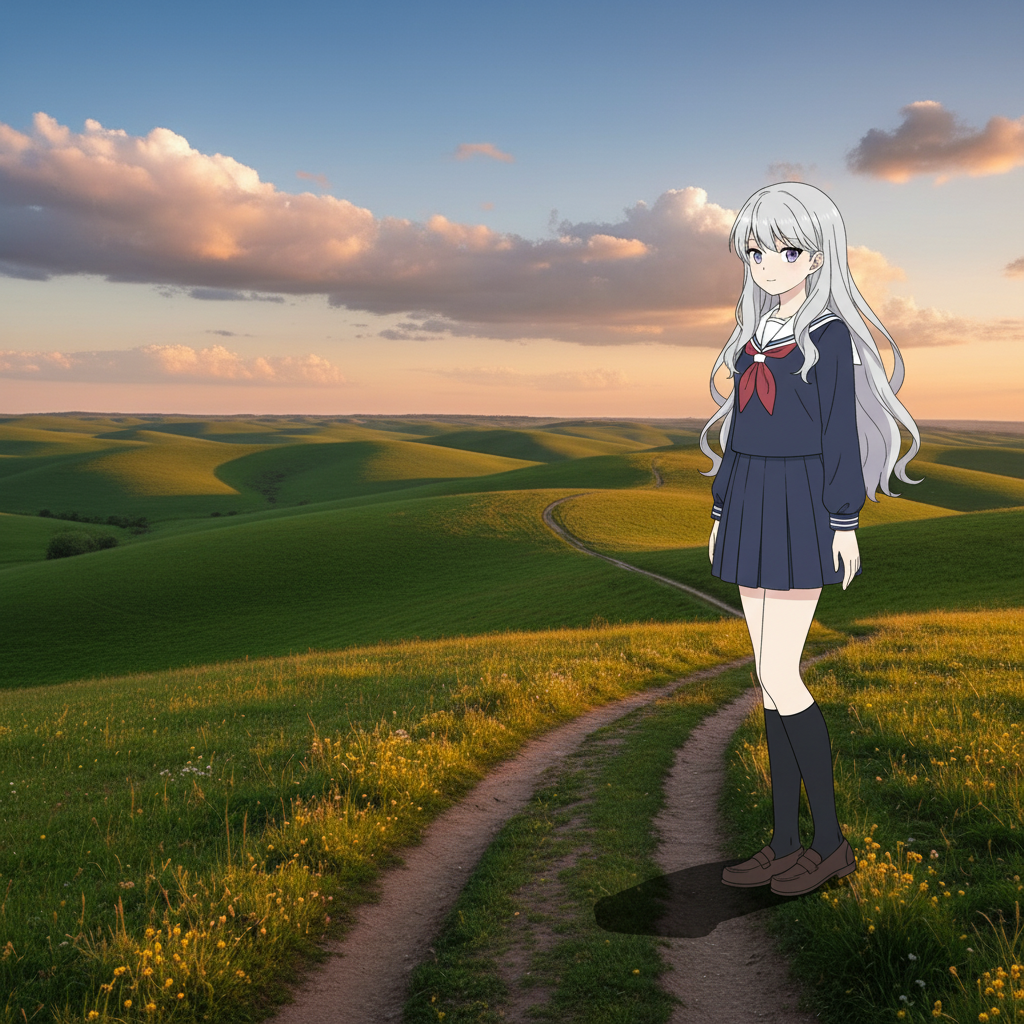
2-3. 実践:ファンタジーシーン
キャラクターを幻想的な森に配置します。
Step 1: 参照画像を準備
- Image 1: キャラクターシート(character_sheet_yuki.png)- Module 05で生成
- Image 2: ファンタジーの森(fantasy_forest.png)- 事前準備 Step 2で生成
Step 2: プロンプトを作成
プロンプトの意図:
| 要素 | 記述 | 意図 |
|---|---|---|
| ポーズと角度 | walking on the forest path, viewed from 3/4 angle | 小道を歩く姿を3/4アングルで |
| 詳細保持 | Retain all character details: armor design, weapon, facial features | 鎧、武器、顔の詳細を維持 |
| 照明統一 | Apply the magical blue-green lighting | 魔法的な青緑の光を適用 |
| 深度統合 | Add subtle fog around the character's feet | 足元に霧を追加して深度を出す |
| スタイル統一 | Maintain fantasy illustration style consistent with Image 2 | 背景と一貫したスタイル |
| 世界観統合 | The character should appear to belong in this world | この世界の住人に見えるように |
Place the character from Image 1 into the mystical forest from Image 2.

Specifications:
- Character is walking on the forest path, viewed from 3/4 angle
- Retain all character details: armor design, weapon, facial features
- Apply the magical blue-green lighting from Image 2 to the character
- Add subtle fog around the character's feet for depth integration
- Maintain fantasy illustration style consistent with Image 2
- The character should appear to belong in this world

Seamless integration between character and environment.
クリックしてPythonコマンドを生成
生成例:
確認ポイント:
- キャラクターの鎧・武器・顔の詳細が維持されているか
- 魔法的な青緑の照明がキャラクターにも適用されているか
- 足元の霧がキャラクターを環境に溶け込ませているか
- ファンタジーイラストのスタイルが統一されているか
2-4. 位置とスケールの指定
より正確な配置のために、位置とスケールを詳細に指定できます。
位置指定のテンプレート:
Position and Scale:
- Character positioned in [HORIZONTAL_POSITION] of the frame
- Character occupies approximately [PERCENTAGE]% of the frame height
- Facing [DIRECTION], looking towards [GAZE_TARGET]
- [FOOT_PLACEMENT]
- [BODY_ANGLE]
テンプレート変数の説明:
| 変数 | 説明 | 選択肢例 |
|---|---|---|
[HORIZONTAL_POSITION] | 水平位置 | left third, center, right third |
[PERCENTAGE] | フレーム高さに対する割合 | 40, 60, 80 |
[DIRECTION] | 向いている方向 | left, right, forward |
[GAZE_TARGET] | 視線の先 | the center, the viewer, the horizon |
[FOOT_PLACEMENT] | 足の配置 | Feet touching the ground naturally |
[BODY_ANGLE] | 体の角度 | Slight 3/4 turn towards the viewer |
実践例:
Place the character from Image 1 into Image 2.

Position and Scale:
- Character positioned in the right third of the frame
- Character occupies approximately 60% of the frame height
- Facing left, looking towards the center of the image
- Feet touching the ground naturally
- Slight 3/4 turn towards the viewer

Environment Integration:
- Match the lighting direction from the background (light from upper left)
- Apply appropriate shadows on the ground
- Adjust color temperature to match the scene
クリックしてPythonコマンドを生成
生成例:
確認ポイント:
- キャラクターがフレームの右1/3に配置されているか
- フレーム高さの約60%を占めているか
- 足が地面に自然に接しているか
- 左上からの光に合わせた影が描かれているか
チェックポイント
- キャラクターを別の背景に配置できた
- 照明とスケールの調整を行った
セクション3: スタイル転写
3-1. 基本テンプレート
元の画像のコンテンツを維持しながら、別の画像のスタイルを適用します。
スタイル転写テンプレート:
[Upload: original.png, style_reference.png]

Transform Image 1 using the artistic style from Image 2.
- Maintain the exact composition and subject from Image 1
- Apply the color palette, brushwork, and texture from Image 2
- Keep facial features recognizable if a person is present
テンプレートの説明:
| 行 | 意味 | 効果 |
|---|---|---|
Transform Image 1 using the artistic style from Image 2 | 画像1を画像2のスタイルで変換 | 基本的な変換指示 |
Maintain the exact composition and subject | 構図と被写体を維持 | 元の配置を保持 |
Apply the color palette, brushwork, and texture | 色、筆遣い、質感を適用 | スタイルの具体的要素 |
Keep facial features recognizable | 顔の特徴を認識可能に | 人物の場合の安全策 |
3-2. 実践:油絵風への変換
写真をゴッホ風の油絵スタイルに変換します。
Step 1: 参照画像を準備
- Image 1: 変換したい写真(photo.jpg)- ご自身の写真を使用
- Image 2: ゴッホ風スタイル参照(vangogh_style.jpg)- 事前準備 Step 3で生成
Step 2: プロンプトを作成
プロンプトの意図:
| 要素 | 記述 | 意図 |
|---|---|---|
| 構図保持 | Preserve the scene composition and lighting direction | 元の構図と光の方向を維持 |
| 筆遣い | Apply the thick, expressive brushstrokes | 厚みのある表現豊かな筆遣い |
| パターン | swirling, dynamic patterns | 渦巻く動的なパターン(ゴッホ特有) |
| 色彩 | vibrant color palette (especially blues and yellows) | 鮮やかな青と黄色 |
| 質感 | visible paint texture and impasto effects | 目に見える絵の具の質感と厚塗り効果 |
| 品質 | feel like an original oil painting, not a filter | フィルターではなく本物の油絵のように |
Transform the photo (Image 1) into the painting style shown in Image 2.

Style Transfer Specifications:
- Preserve the scene composition and lighting direction from Image 1
- Apply the thick, expressive brushstrokes from Image 2
- Use the swirling, dynamic patterns characteristic of the style
- Adopt the vibrant color palette (especially blues and yellows)
- Maintain recognizable facial features if a person is present
- Add visible paint texture and impasto effects

The result should feel like an original oil painting, not a filter.
クリックしてPythonコマンドを生成
生成例:
確認ポイント:
- 厚みのある表現豊かな筆遣いが適用されているか
- 渦巻くパターン(ゴッホ特有)が見られるか
- 青と黄色の鮮やかな色彩になっているか
- 元の構図と光の方向が維持されているか
- フィルターではなく本物の油絵のように見えるか
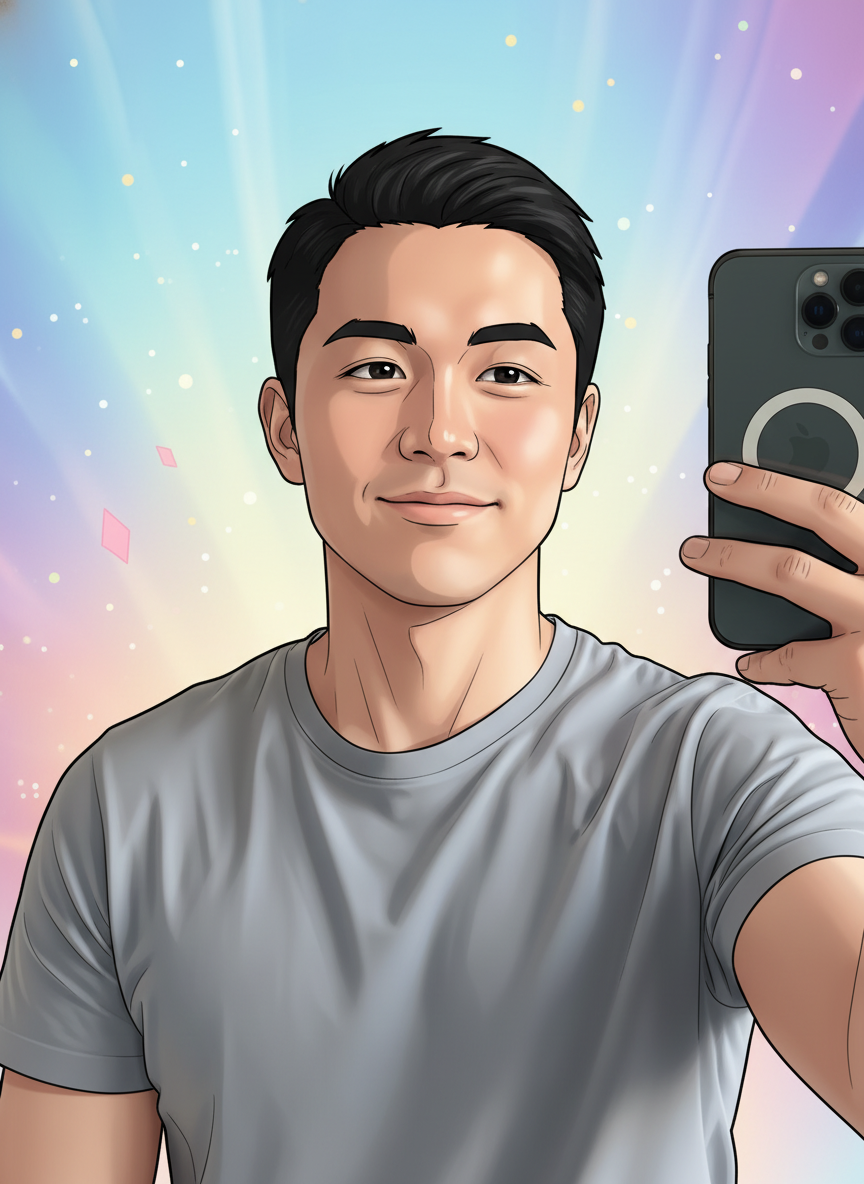
3-3. 実践:アニメ風への変換
セルフィーを日本のアニメスタイルに変換します。
Step 1: 参照画像を準備
- Image 1: 変換したいセルフィー(selfie.jpg)- ご自身の写真を使用
- Image 2: アニメスタイル参照(anime_style_reference.png)- 事前準備 Step 3で生成
Step 2: プロンプトを作成
プロンプトの意図:
| 要素 | 記述 | 意図 |
|---|---|---|
| 顔の構造保持 | Keep my exact facial structure, hairstyle, and expression | 顔の形、髪型、表情を維持 |
| アニメ技法 | cel-shading and bold outlines | セルシェーディングと太い輪郭線 |
| 色彩・照明 | Use the color palette and lighting style | 参照画像の色と照明を使用 |
| 目の表現 | Large expressive eyes while maintaining face recognition | 大きく表現豊かな目(ただし認識可能に) |
| 肌の質感 | Smooth skin with anime-style shading | 滑らかな肌とアニメ風シェーディング |
| 品質 | look like official anime character art | 公式アニメキャラのような仕上がり |
Transform this selfie (Image 1) into Japanese anime style matching Image 2.

Style Transfer Specifications:
- Keep my exact facial structure, hairstyle, and expression
- Apply the cel-shading and bold outlines from Image 2
- Use the color palette and lighting style from Image 2
- Large expressive eyes while maintaining face recognition
- Clean, professional anime illustration quality
- Smooth skin with anime-style shading
- Simplified but recognizable features

The result should look like official anime character art.
クリックしてPythonコマンドを生成
生成例:
確認ポイント:
- 元の顔の構造(顔の形、髪型、表情)が認識できるか
- セルシェーディングと太い輪郭線が適用されているか
- 大きく表現豊かな目になっているか(ただし認識可能)
- 滑らかな肌とアニメ風シェーディングになっているか
- 公式アニメキャラのような仕上がりになっているか
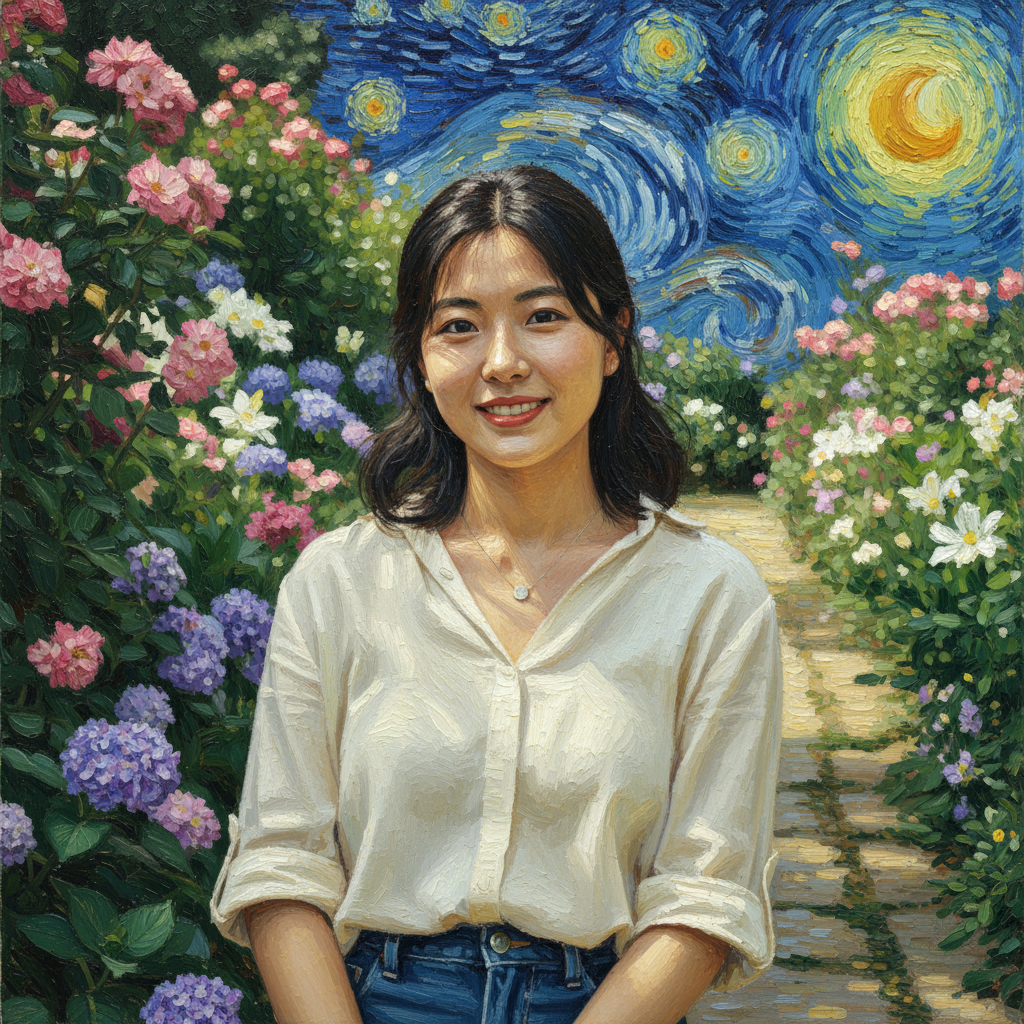
3-4. 様々なスタイル転写例
| 転写先スタイル | キーワード例 |
|---|---|
| 水彩画 | watercolor painting, soft washes, visible paper texture |
| 油絵 | oil painting, thick brushstrokes, impasto, visible canvas |
| 浮世絵 | ukiyo-e, woodblock print, flat colors, bold outlines |
| ポップアート | pop art, bold colors, halftone dots, high contrast |
| ピクセルアート | pixel art, 16-bit style, limited color palette |
| アールヌーボー | art nouveau, flowing organic lines, decorative borders |
| サイバーパンク | cyberpunk aesthetic, neon colors, rain, dark atmosphere |
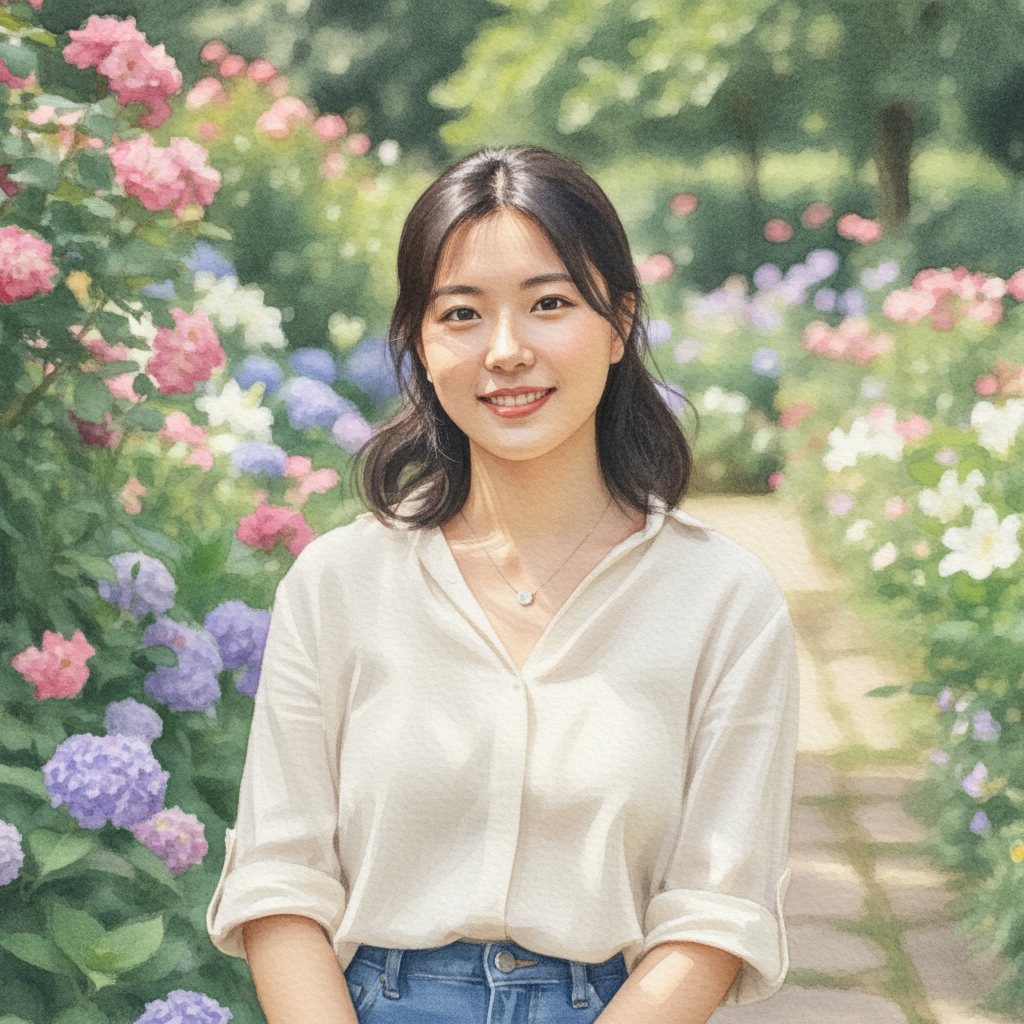
水彩画風プロンプト:
Transform Image 1 into a delicate watercolor painting style.
- Soft, translucent washes of color
- Visible paper texture showing through
- Loose, flowing brushwork
- Colors bleeding slightly at edges
- Light, airy feel with white paper highlights
クリックしてPythonコマンドを生成
生成例:
確認ポイント:
- 柔らかく透明感のある色の層が見えるか
- 紙の質感が透けて見えるか
- 色がエッジでにじんでいるか
浮世絵風プロンプト:
Transform Image 1 into traditional Japanese ukiyo-e woodblock print style.
- Flat areas of color with bold black outlines
- Limited color palette (traditional Japanese colors)
- Stylized waves or patterns in background
- No gradients, only solid colors
- Decorative border elements
クリックしてPythonコマンドを生成
生成例:
確認ポイント:
- 太い黒の輪郭線でフラットな色面が表現されているか
- 日本の伝統色(朱、藍、鶯茶など)が使われているか
- グラデーションなしの単色塗りになっているか
- 背景に様式化された波や模様があるか
チェックポイント
- 写真を絵画風に変換できた
- 実写をアニメ風に変換できた
セクション4: 複数参照画像の組み合わせ
4-1. 3つの役割を同時に使用
Subject + Style + Background を同時に指定します。
Step 1: 3つの参照画像を準備
- Image 1: キャラクターシート(character_sheet_yuki.png)→ Subject - Module 05で生成
- Image 2: 背景(background.png)→ Background - 事前準備 Step 2で生成
- Image 3: スタイル参照(ghibli_style_reference.jpg など)→ Style - 事前準備 Step 3で生成
Step 2: 各画像の役割を明示するプロンプトを作成
プロンプト構造:
| 画像 | 役割 | 使用する要素 |
|---|---|---|
| Image 1 | Subject | 顔の特徴、体型、服装 |
| Image 2 | Background | 環境、建築、空間配置 |
| Image 3 | Style | 色パレット、筆遣い、照明 |
Create a new image combining elements from all three reference images:

Image 1 (Subject Reference):
- Use the character's identity (facial features, body type)

Image 2 (Background Reference):
- Use this environment and setting
- Maintain the architecture and spatial layout

Image 3 (Style Reference):
- Apply this artistic style (color palette, brushwork, lighting)

Specifications:
- Character from Image 1 standing in the center of Image 2's environment
- Apply the artistic style and mood from Image 3
- Seamless integration between all elements
- Consistent lighting derived from Image 3's style
クリックしてPythonコマンドを生成
生成例:
確認ポイント:
- キャラクターのアイデンティティ(顔、体型)がImage 1と一致しているか
- 背景環境がImage 2のものになっているか
- アートスタイル(色、筆遣い、照明)がImage 3と統一されているか
- 3つの要素がシームレスに統合されているか
4-2. 実践:キャラクター + 背景 + スタイル(ジブリ風)
キャラクターを森の背景に配置し、ジブリ風のスタイルで描画します。
Step 1: 参照画像を準備
- Image 1: キャラクターシート(character_sheet_yuki.png)
- Image 2: 森の写真(forest_photo.png)- 事前準備 Step 5で生成
- Image 3: ジブリ風スタイル参照(ghibli_style_reference.jpg)- 事前準備 Step 3で生成
プロンプトの意図:
| 要素 | 記述 | 意図 |
|---|---|---|
| キャラクター | exact character design and features | キャラクターのデザインを正確に再現 |
| 環境 | mystical forest setting, composition and depth | 森の雰囲気と奥行きを維持 |
| スタイル | Studio Ghibli-like animation style | ジブリ特有のアニメーション |
| 色彩 | warm, soft color palette | 暖かく柔らかい色使い |
| 配置 | center-left, walking into the scene | 中央左、シーンに入っていく姿勢 |
| 表情 | Wonder and curiosity | 驚きと好奇心 |
Create a new image with the following specifications:

From Image 1 (Character):
- Use the exact character design and features
- Maintain clothing and accessories

From Image 2 (Environment):
- Use the mystical forest setting
- Keep the composition and depth

From Image 3 (Style):
- Apply the Studio Ghibli-like animation style
- Use the warm, soft color palette
- Apply the characteristic lighting and atmosphere

The character from Image 1 should be walking through the forest from Image 2,
all rendered in the beautiful animation style of Image 3.

Position: Character in center-left, walking into the scene
Expression: Wonder and curiosity
クリックしてPythonコマンドを生成
生成例:
確認ポイント:
- キャラクターのデザイン(服装、アクセサリー)が維持されているか
- 森の神秘的な雰囲気と奥行きが表現されているか
- ジブリ特有の暖かく柔らかい色パレットが適用されているか
- キャラクターが中央左に配置され、驚きと好奇心の表情をしているか
- すべての要素が美しいアニメーションスタイルで統一されているか
4-3. ポーズ参照(Control Image)の活用
特定のポーズを維持しながら、別のキャラクターに適用します。
Step 1: 参照画像を準備
- Image 1: キャラクターシート(character_sheet_yuki.png)→ アイデンティティ - Module 05で生成
- Image 2: アクションポーズ参照(action_pose.png)→ Control - 事前準備 Step 4で生成
プロンプトの意図:
| 要素 | 記述 | 意図 |
|---|---|---|
| アイデンティティ | character's face, hair, and clothing | 顔、髪、服装をImage 1から使用 |
| ポーズ | exact pose and body position | Image 2のポーズを正確に再現 |
| 手の位置 | Copy the arm positions and hand gestures | 腕と手のジェスチャーをコピー |
| カメラアングル | Maintain the camera angle | Image 2と同じアングルを維持 |
| エネルギー | dynamic energy and movement | 動きのエネルギーを再現 |
Create a new image using:

Image 1 (Character Identity):
- Use this character's face, hair, and clothing

Image 2 (Pose Reference):
- Match this exact pose and body position
- Copy the arm positions and hand gestures
- Maintain the camera angle

Keep the character from Image 1 but pose them exactly like Image 2.
Match the dynamic energy and movement from the pose reference.
クリックしてPythonコマンドを生成
生成例:
確認ポイント:
- キャラクターの顔・髪・服装がImage 1と一致しているか
- ポーズ(体の位置、腕の配置、手のジェスチャー)がImage 2と一致しているか
- カメラアングルがImage 2と同じになっているか
- 動きのエネルギーとダイナミックさが表現されているか
4-4. ベストプラクティス
1. 役割ラベルを先に記述 創造的な指示の前に、各画像の役割を明確にする。
2. 照明の統一 1つの画像(通常は背景)を光の方向と色温度の基準にする。
3. アイデンティティ保持の明示
Retain facial identity, eye color, hairstyle, and clothing details
from subject_primary.
4. 過剰プロンプトを避ける 「4k, trending on artstation, masterpiece」などは不要。自然言語で記述的に。
チェックポイント
- 3つ以上の参照画像を組み合わせた
- 各画像の役割を明示的に指定した
セクション5: 実践プロジェクト
プロジェクト:オリジナルキャラクターの世界観構築
既存のキャラクターを様々な場面・スタイルで展開します。
Step 1: ベースキャラクターシートを生成
まず、参照画像として使用するキャラクターシートを生成します。
キャラクター設定:
| 要素 | 設定 |
|---|---|
| 名前 | Kai(カイ) |
| 年齢 | 20歳 |
| 髪 | ボサボサの茶髪に白いメッシュ1本 |
| 目 | 暖かい琥珀色 |
| 肌 | 薄い日焼け肌、顎に小さな傷 |
| 服装 | 暗緑のマント、茶色の革鎧 |
| 持ち物 | 使い込んだバックパック、腰に剣 |
Character design sheet for Kai, a young adventurer:
Front view, side view, action pose.

- 20 years old male
- Messy brown hair with a single white streak
- Warm amber eyes
- Light tan skin with a small scar on chin
- Wearing a dark green traveling cloak over brown leather armor
- Carrying a worn backpack and a sword at hip

Fantasy RPG style, detailed illustration, white background.
クリックしてPythonコマンドを生成
生成例:
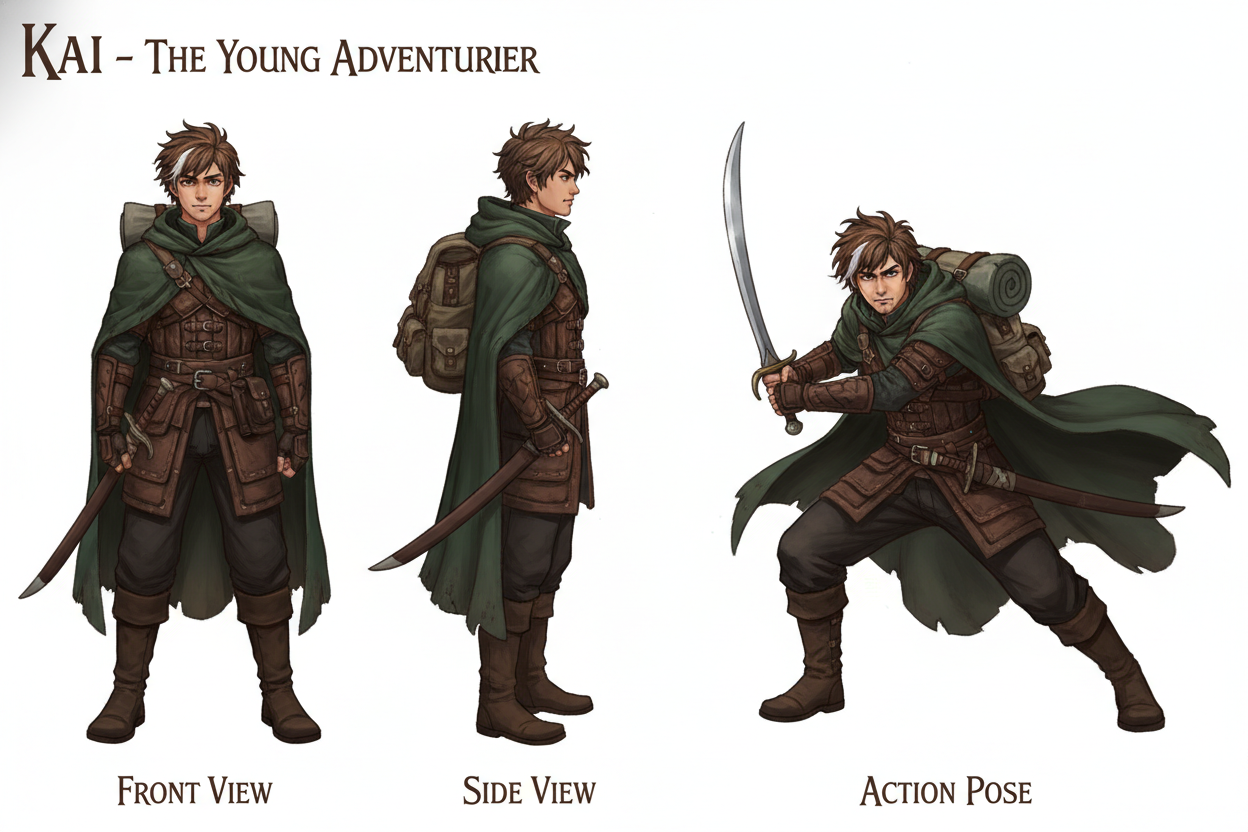
確認ポイント:
- 正面、横、アクションポーズの3つが含まれているか
- 白いメッシュが1本入った茶色のボサボサ髪が描かれているか
- 暖かい琥珀色の目になっているか
- 顎の小さな傷が描かれているか
- 暗緑のマントと茶色の革鎧が統一されているか
Step 2: 異なる環境に配置
生成したキャラクターシート(kai_base.png)を参照画像として、様々な環境に配置します。
環境バリエーション:
| 環境 | 説明 |
|---|---|
| 森の中 | 光るキノコのある魔法の森、霧がかった雰囲気 |
| 城下町 | 中世の市場、商人や住民で賑わう |
| 雪山 | 厳しい風、ドラマチックな雲 |
| ダンジョン | 暗い回廊、松明の光、石壁 |
森の中プロンプト:
Place the character from Image 1 into a new scene.

Environment: dense magical forest with glowing mushrooms, misty atmosphere

Maintain exact character features from the reference:
- Messy brown hair with white streak
- Amber eyes
- Green cloak and brown leather armor

The character should look like they belong in this environment.
Match lighting to the scene naturally.
Dynamic pose appropriate for the setting.
クリックしてPythonコマンドを生成
生成例:
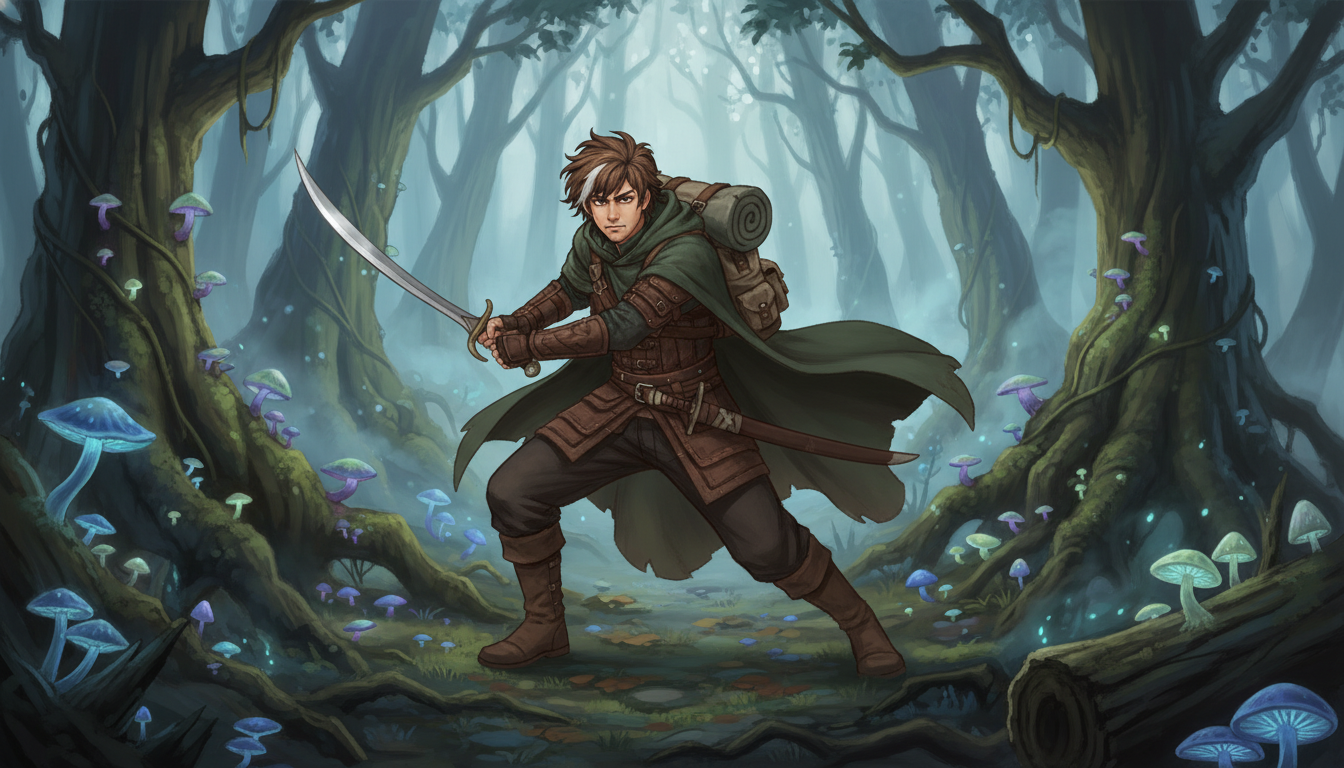
確認ポイント:
- Kaiの特徴(茶髪+白メッシュ、琥珀の目、緑マント、革鎧)が維持されているか
- 光るキノコのある密な魔法の森が描かれているか
- 霧がかった雰囲気が表現されているか
- 照明が環境(光るキノコ、霧)に自然に合っているか
- 動きのあるポーズが設定に適しているか
Step 3: 異なるスタイルで描画
同じキャラクターを異なるアートスタイルで描画します。
スタイルバリエーション:
| スタイル | 説明 |
|---|---|
| 水彩 | 柔らかい水彩画、筆跡と紙の質感が見える |
| ピクセル | 16ビットスタイル、限定色パレット、レトロゲーム風 |
| 墨絵 | 日本の伝統的な墨絵、ミニマル、流れるような筆遣い |
水彩スタイルプロンプト:
Render the character from Image 1 in a new artistic style.

Style: soft watercolor painting with visible brush strokes and paper texture

Maintain character identity and recognizable features.
Apply the artistic style thoroughly.
クリックしてPythonコマンドを生成
生成例:
確認ポイント:
- キャラクターのアイデンティティ(顔、特徴)が認識できるか
- 柔らかい水彩画のスタイルが適用されているか
- 筆跡と紙の質感が見えるか
- スタイルが徹底して(部分的ではなく全体に)適用されているか
セクション5のチェックポイント
- ベースキャラクターシートを生成した
- キャラクターを異なる環境に配置した
- キャラクターを異なるスタイルで描画した
トラブルシューティング
キャラクターが背景に溶け込まない
原因: 照明の不一致
解決策:
Match the lighting direction and color temperature from the background.
Add appropriate shadows on the ground.
Apply ambient lighting from the environment to the character.
スタイル転写が弱い
原因: スタイル参照の記述が曖昧
解決策:
- スタイルの特徴を具体的に記述する
- 「Apply the style thoroughly, not subtly」を追加
- より特徴的なスタイル参照画像を使用する
複数画像の要素が混ざる
原因: 役割の指定が不明確
解決策:
IMPORTANT: Use ONLY the character from Image 1.
IMPORTANT: Use ONLY the background from Image 2.
IMPORTANT: Use ONLY the style from Image 3.
Do not mix elements between these roles.
スケールがおかしい
原因: サイズの指定が不足
解決策:
Scale the character to occupy approximately 40% of the frame height.
Position so feet are touching the ground naturally.
Match the perspective and vanishing point of the background.
まとめ
このモジュールで学んだこと
- 4つの役割: Subject, Style, Background, Control
- キャラクター配置: 自然な合成のためのテクニック
- スタイル転写: 写真を様々な画風に変換
- 複数参照画像: 役割を明示して組み合わせ
参照画像活用チェックリスト
- 各画像の役割を明示的に記述している
- 照明の統一を意識している
- キャラクターのアイデンティティ保持を明記している
- スケールと位置を適切に指定している
次のステップ
Module 07では、実写人物生成、テキストレンダリング、部分編集について学びます。より精密なコントロール技術を習得します。
よくある質問
Q: 著作権のある画像をスタイル参照に使っても大丈夫ですか? A: 個人利用では問題ありませんが、商用利用する場合は注意が必要です。スタイルの「アイデア」は著作権で保護されませんが、特定のキャラクターやブランド要素は避けてください。
Q: 参照画像の解像度はどの程度必要ですか? A: 最低でも512x512ピクセル、推奨は1024x1024ピクセルです。高すぎる解像度(4K以上)はAPIエラーの原因になることがあります。
Q: 参照画像の順番は重要ですか? A: はい。プロンプトで「Image 1」「Image 2」と参照する場合、アップロード順序と一致している必要があります。
Q: なぜスタイル転写が完全にうまくいかないことがあるのですか? A: AIは元画像の内容を保持しようとするため、スタイル適用と内容保持のバランスを取ります。より強いスタイル適用が必要な場合は、「Apply the style thoroughly, prioritize style over photorealistic accuracy」と明記してください。
Q: 実写の人物を参照として使用できますか? A: はい、ただし本人の同意なく他人の写真を使用したり、有名人の画像を使用することは避けてください。AI生成画像にはSynthIDウォーターマークが付与されます。